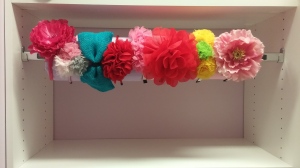
Updated DIY Headband Holder!

My most popular post here is always my DIY Headband Holder how-to.

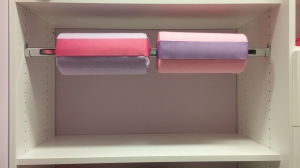
The version I created then is meant to be hung on a hook. Working with my girls’ new closets, I came up with a more integrated placement for it. Their closets are fantastic in the way that they are extremely customizable, allowing for changes such as shelving vs. hanging space. I followed the same directions as my older post until placing the ends-like the flowers. Instead, I now put a hanging rod through the tube. To help it stay in place I added a strip of No Slip Grip tape I use when creating clips onto the top of the rod. In addition, I stuffed each end with tissues as far as I could. As shown, 2 rolls fill the rod. Since my girls have way more headbands, I will definitely be adding another rod or two, probably removing the shelf underneath for more space!

(The ribbon is for decorative purposes only-a cute way of hiding the seam. You can also just face it towards the back to have a seamless look or if using a printed fabric.)

Happy crafting:)0628151712 0628151718

Stain removal trick-it really works!

This week I noticed a 4″ diameter stain on my fave greyish denimish skirt! No idea where it came from (a cooking splatter does NOT look like that). Panic mode set in. It was almost as dramatic as it sounds lol.

Level one of damage control consisted of a bunch of spritzes of Shout Stain Remover. I left it overnight and the next AM rinsed it to find nothing changed. Bahahawaaaaa!!! I spritzed more.

I then remembered I had read somewhere sometime about shampoo taking out greasy stains. Makes sense I guess. Greasy hair, greasy stains…I tried it. I poured some


Continue reading

DIY headband holder

I’ve been meaning to make a headband holder for my girls since forever and finally had a chance today! On the left is one of my complete no sew holders. I made two of these today (one set for each daughter) but once you figure out what needs to be done it’s fairly simple.

I have seen this style with just the top part, but as I create hair accessories that I sell on my other blog-Mbellishd-check it out!, my girls needed more space so I added the bottom section. I think I may add a third sometime as well. I also plan to add two white hooks on the very bottom for their pony holders.

I figured I will share how I did it with step-by step pix and instructions. Hope it’s all easily understood! Let me know if you have any questions:)

What you need:

1 roll of paper towel per section

measuring tape

scissors

embellishment for ends (can be buttons flowers etc.)

glue gun

material (app. 19″ x 22″ for each roll)

4.25 feet of ribbon (not pictured)

———-

You want to get your paper towel roll to about 5-5.25″, so unroll the excess until you get to desired width Continue reading

DIY Exfoliating scrub for lips/skin!

I’ve seen this around the web and finally decided to test it out: using sugar and olive oil to exfoliate for your lips (and skin)!

I put 1 teaspoon of each in a cup and mixed it around. For me it is just the right amount for my face but feel free to play around with the measurements to find your personal fave combo such as more of everything or use less sugar for a less “harsh” feel.

The sugar part acts as Continue reading